RBAC for OpenID Connect (OIDC)
ENTERPRISE: Role based access controls are available for Sensu Enterprise users only.
Reference Documentation
What is RBAC for OIDC?
The Sensu Enterprise Dashboard offers support for built-in Role Based Access Controls (RBAC), which depends on using some external source of truth for authentication. The Sensu Enterprise Dashboard RBAC for OIDC driver provides support for using the OpenID Connect 1.0 protocol (OIDC) on top of the OAuth 2.0 protocol for RBAC authentication.
RBAC for OIDC configuration
Example RBAC for OIDC definition
{
  "dashboard": {
    "host": "0.0.0.0",
    "port": 3000,
    "...": "",
    "oidc": {
      "additionalScopes": [ "groups" ],
      "clientId": "a8e43af034e7f2608780",
      "clientSecret": "b63968394be6ed2edb61c93847ee792f31bf6216",
      "insecure": false,
      "redirectURL": "http://127.0.0.1:4000/login/callback",
      "server": "https://localhost:9031",
      "roles": [
        {
          "name": "guests",
          "members": [
            "myorganization/guests"
          ],
          "datacenters": [
            "us-west-1"
          ],
          "subscriptions": [
            "webserver"
          ],
          "readonly": true
        },
        {
          "name": "operators",
          "members": [
            "myorganization/operators"
          ],
          "datacenters": [],
          "subscriptions": [],
          "readonly": false
        }
      ]
    }
  }
}
RBAC for OIDC definition specification
oidc attributes
| additionalScopes | |
|---|---|
| description | Scopes to include in the claims, in addition to the default email, openid and profile scopes. NOTE: only required for certain OIDC providers, such as Okta. |
| required | false |
| type | Array |
| example | |
| clientId | |
|---|---|
| description | The OIDC provider application “Client ID” NOTE: requires registration of an application in the OIDC provider. |
| required | true |
| type | String |
| example | |
| clientSecret | |
|---|---|
| description | The OIDC provider application “Client Secret” NOTE: requires registration of an application in the OIDC provider. |
| required | true |
| type | String |
| example | |
| insecure | |
|---|---|
| description | Determines whether or not to skip SSL certificate verification (e.g. for self-signed certificates). |
| required | false |
| type | Boolean |
| default | false |
| example | |
| redirectURL | |
|---|---|
| description | Redirect URL to provide to the OIDC provider. NOTE: only required for certain OIDC providers, such as Okta. |
| required | false |
| type | String |
| example | |
| server | |
|---|---|
| description | The location of the OIDC server you wish to authenticate against. |
| required | true |
| type | String |
| example | |
| roles | |
|---|---|
| description | An array of roles definitions. |
| required | true |
| type | Array |
| example | |
roles attributes
Please see the RBAC definition specification for information on how to configure RBAC roles.
Register an OIDC Application
To use OIDC for authentication requires registration of your Sensu Enterprise Dashboard as an “application”. Please note the following instructions to register an OIDC application for Sensu Enterprise based on your OIDC provider:
Okta
Requirements
- Access to the Okta Administrator Dashboard
- Sensu Enterprise Dashboard 2.9.0 or later
Create an Okta Application
- From the Administrator Dashboard, select
Applications > Add Application > Create New Appto start the wizard. - Select the
Webplatform andOpenID Connectsign in method. - In General Settings enter an app name and (optionally) upload a logo.
- In Configure OpenID Connect, add the following Redirect URI, without forgetting to replace DASHBOARD_URL with the URL to your dashboard:
{DASHBOARD_URL}/login/callback - Click Save.
- Head over to the Sign On page and click on the Edit button of the OpenID Connect ID Token section.
- Enter the following information for the Groups claim attribute
- First field:
groups - Dropdown menu:
Regex - Second field:
.*
- Click Save
- Make sure to assign people and/or groups in the Assignments page
OIDC Driver Configuration
-
Add the
additionalScopesconfiguration attribute in the OIDC scope and set the value to[ "groups" ], just like this:"additionalScopes": [ "groups" ] -
Add the
redirectURLconfiguration attribute in the OIDC scope and set the value to the Redirect URI configured at step 4 of Create an Okta Application, just like this:
"redirectURL": "{DASHBOARD_URL}/login/callback"
PingFederate
Requirements
- PingFederate Server 8. This documentation was created using the version 8.3.0.1
- Access to the PingFederate administrative console
- A configured identity data store. This documentation was created using Active Directory
Enable the OAuth 2.0 Authorization Server
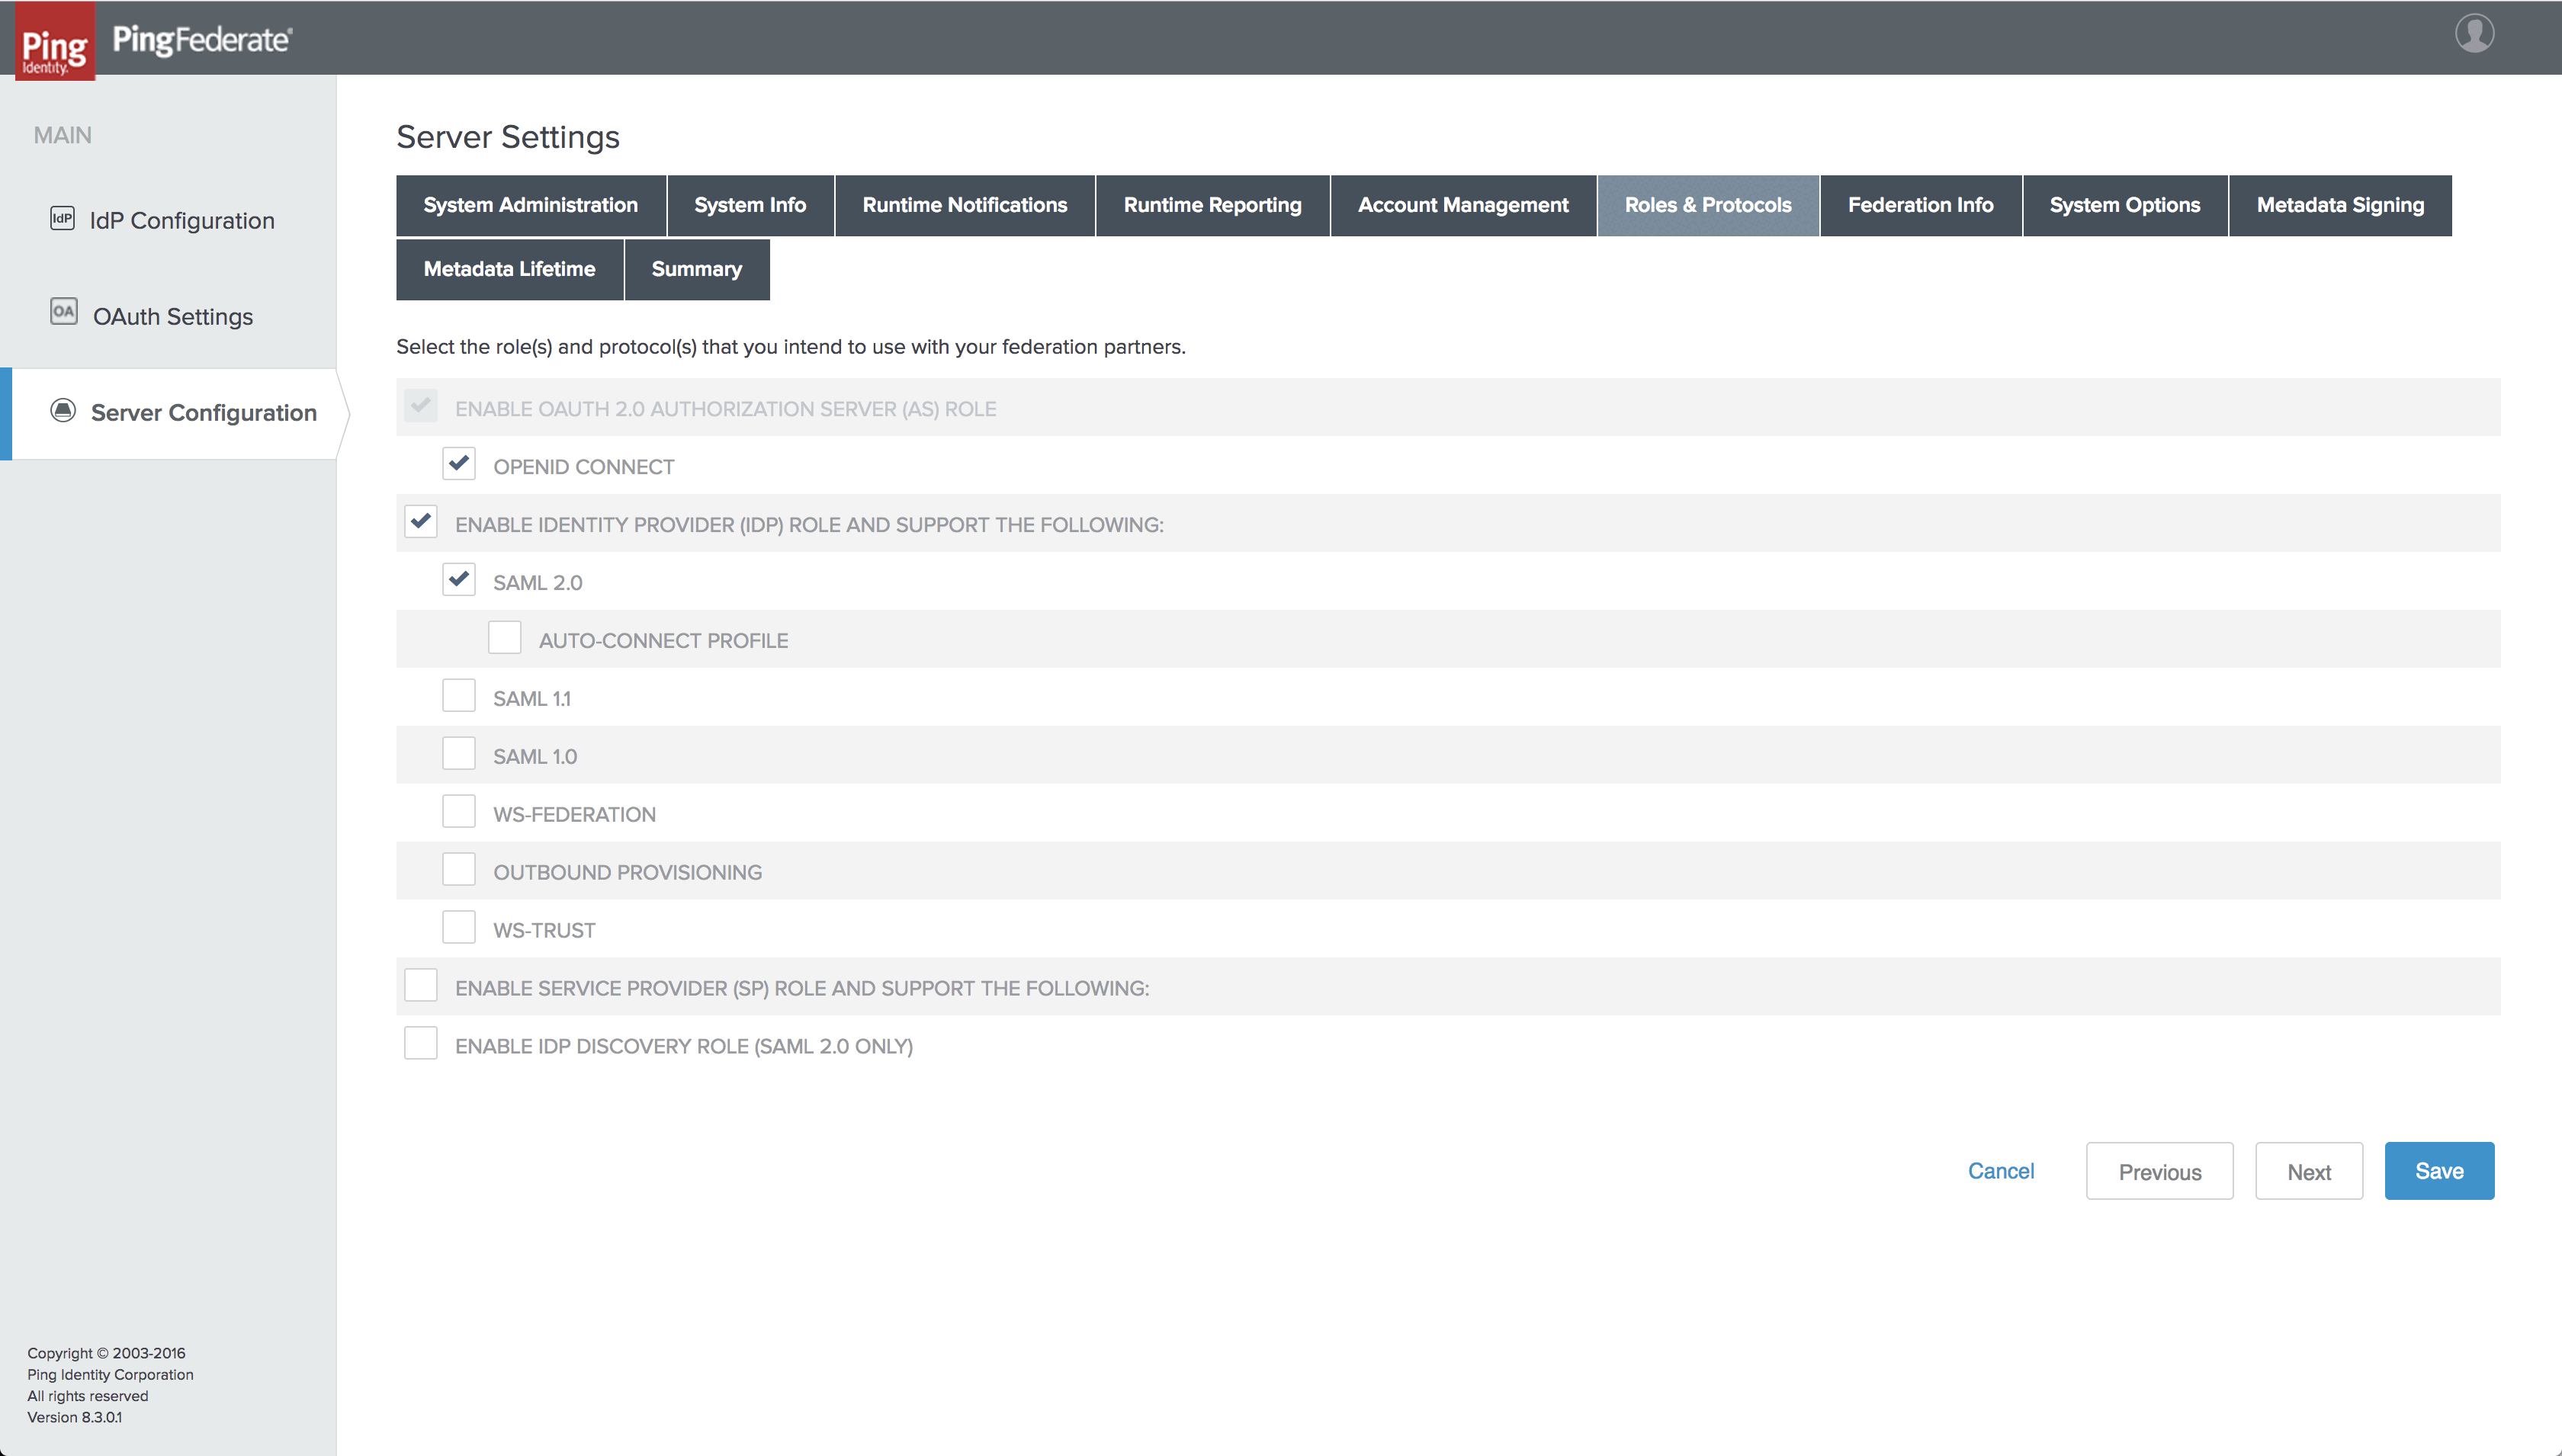
OpenID Connect is an authentication layer on top of OAuth 2.0, which requires the OAuth 2.0 authorization server to be enabled in PingFederate:
- From the PingFederate administrative console, click on
Server Configurationand within theSYSTEM SETTINGSsection, click onServer Settings. - On the Server Settings page, click on
Roles & Protocols. - Check the following items:
ENABLE OAUTH 2.0 AUTHORIZATION SERVER (AS) ROLEOPENID CONNECTENABLE IDENTITY PROVIDER (IDP) ROLE AND SUPPORT THE FOLLOWING:SAML 2.0
- Click
Save.
Create a Credential Validator
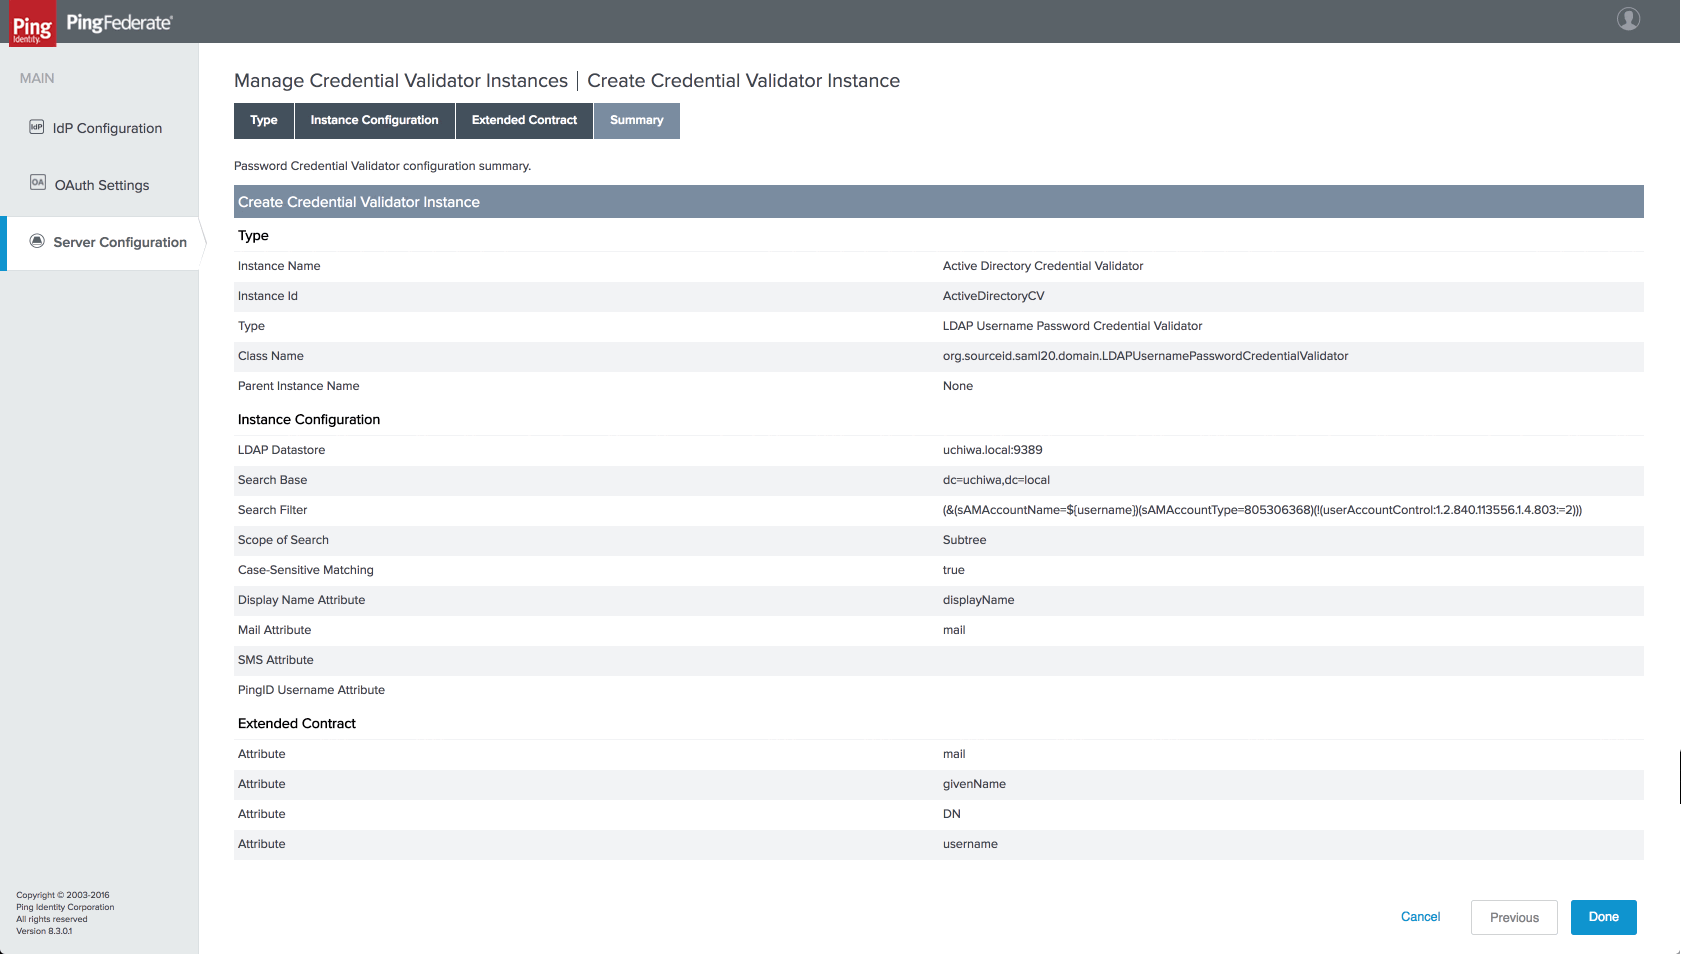
In order to verify the username and password, a Credential Validator must be configured. These steps assume that Active Directory is used:
- From the PingFederate administrative console, click on
Server Configurationand within theAUTHENTICATIONsection, click onPassword Credential Validators. - On the Manage Credential Validator Instances page, click on
Create New Instance. - In the Type section, enter the following information:
- Set INSTANCE NAME to
Active Directory Credential Validator - Set INSTANCE ID to
ActiveDirectoryCV - Set TYPE to
LDAP Username Password Credential Validator - Click the
Nextbutton
- In the Instance Configuration section, enter the following information:
-
Set LDAP DATASTORE to your configured LDAP data store
-
Set SEARCH BASE according to your directory, e.g.
cn=users,dc=domain,dc=tld -
Set SEARCH FILTER to:
(&(sAMAccountName=${username})(sAMAccountType=805306368)(!(userAccountControl:1.2.840.113556.1.4.803:=2)))
- Click
Next. - Click the
Nextbutton on the Extended Contract section. - Review your configuation and click the
Donebutton. - Click
Save.
Configure the PingFederate Authorization Server
- From the PingFederate administrative console, click on
OAuth Settingsand within theAUTHORIZATION SERVERsection, click onAuthorization Server Settings. - Scroll down to the bottom of the page in order to find the OAuth Administrative Web Services Settings section.
- Set PASSWORD CREDENTIAL VALIDATOR to
Active Directory Credential Validator. - Click
Save.
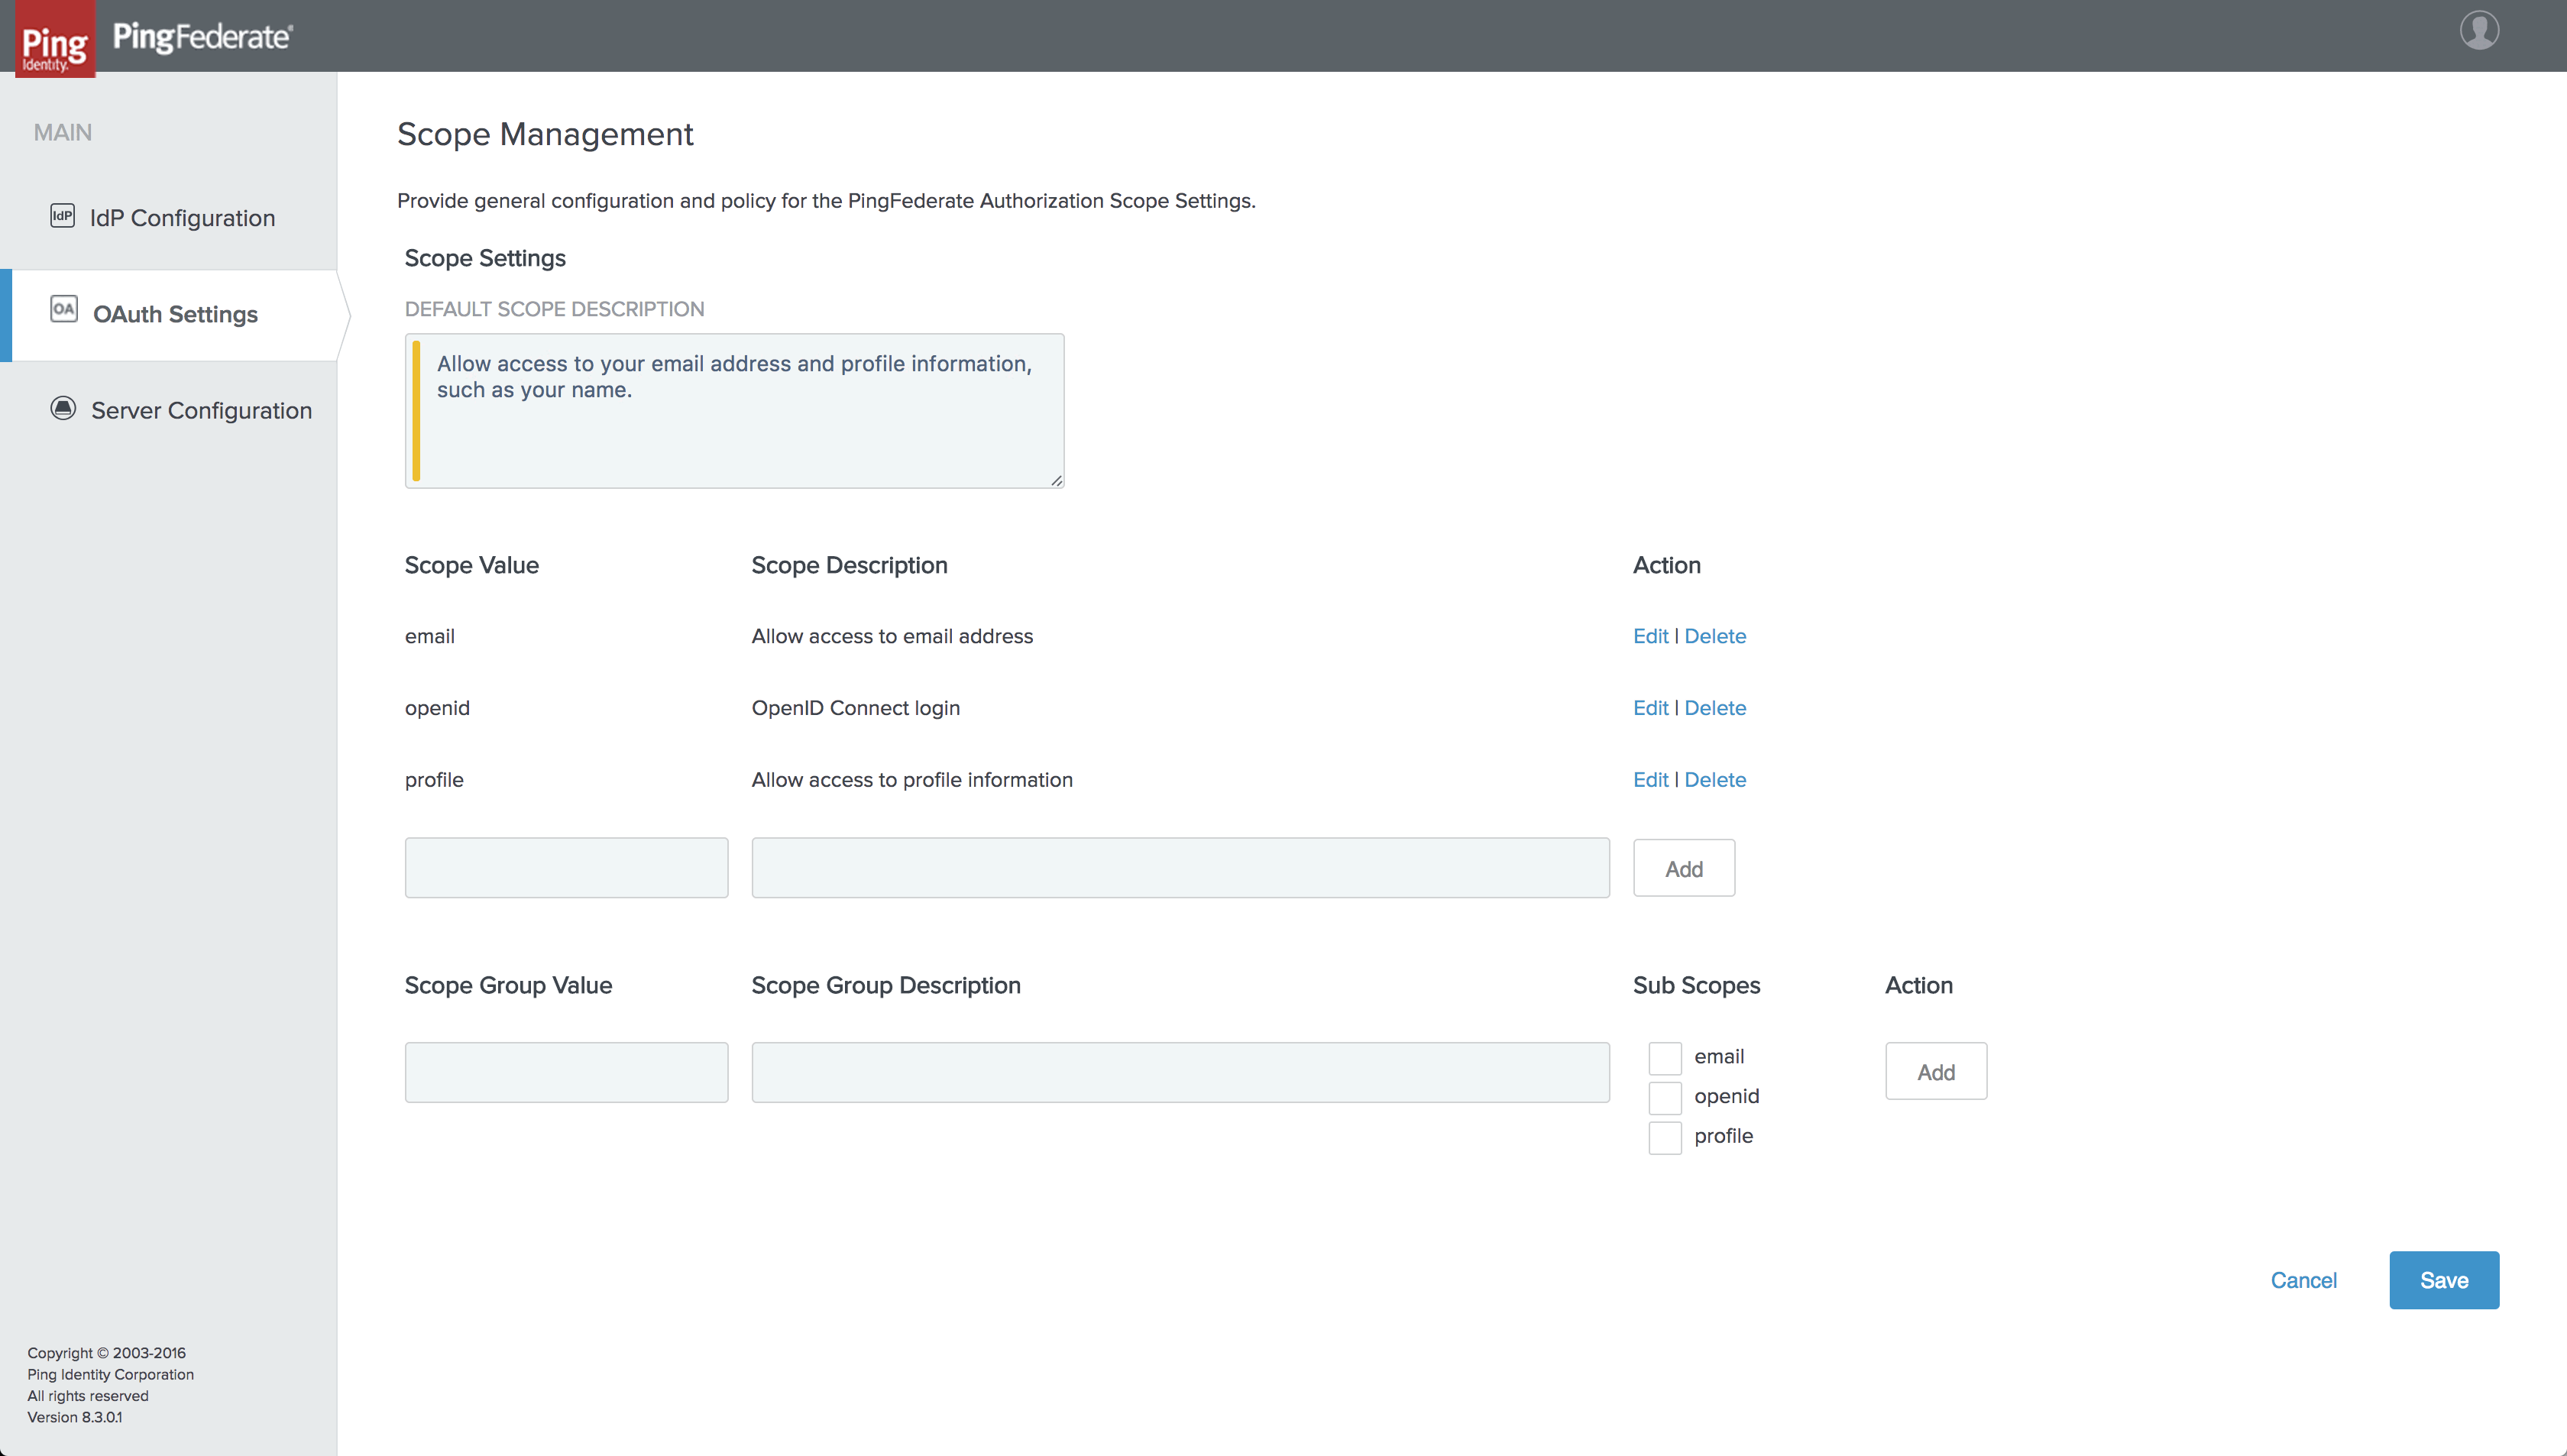
Configure the Scope Management
-
From the PingFederate administrative console, click on
OAuth Settingsand within theAUTHORIZATION SERVERsection, click onScope Management. -
On the Scope Management page, enter a message in Default Scope description that will be presented to the user once they login, such as:
Allow access to your email address and profile information, such as your name.
-
On the same page, add the following scope values and descriptions:
Scope Value Scope Description emailAllow access to email addressopenidOpenID Connect loginprofileAllow access to profile information -
Click
Save.
Create the application
- From the PingFederate administrative console, click on
OAuth Settingsand within theCLIENTSsection, click onCreate New. - On the Client page, enter the following information:
- Set CLIENT ID to
SensuEnterpriseClient - Check the
CLIENT SECRETradio button - Click
Generate Secretand copy the secret returned; you will need it in your Sensu Enterprise Dashboard configuration - Set NAME to
Sensu Enterprise Client - Add the following REDIRECT URI and click
Add:{DASHBOARD_URL}/login/callbackNOTE: this URL does not need to be publicly accessible - as long as a user has network access to both PingFederate and the callback URL, s/he will be able to authenticate; for example, this will allow users to authenticate to a Sensu Enterprise Dashboard service running on a private network as long as the user has access to the network (e.g. locally or via VPN). - Set ALLOWED GRANT TYPES to
Authorization CodeandRefresh Token - Set PERSISTENT GRANTS EXPIRATION to
Grants Do Not Expire - Set Refresh Token Rolling Policy to
Don't Roll - Set ID Token Signing Algorithm to
RSA using SHA-256 - Check Grant Access to Session Revocation API
- Click
Save.
Create an Access Token Management Instance
- From the PingFederate administrative console, click on
OAuth Settingsand within theTOKEN & ATTRIBUTE MAPPINGsection, click onAccess Token Management. - On the Access Token Management page, click on
Create New Instance. - In the Type section, enter the following information:
- Set INSTANCE NAME to
Sensu Enterprise Client - Set INSTANCE ID to
SensuEnterpriseClient - Set TYPE to
Internally Managed Reference Tokens - Click
Next
- In the Instance Configuration section, leave the default values unless you need to tweak them and click
Next. - In the Session Validation section, click
Next. - In the Access Token Attribute Contract section, enter
subinto the input box and clickAddthenNext. - In the Resource URIs section, click
Next. - In the Access Control section, check RESTRICT ALLOWED CLIENTS and select
SensuEnterpriseClientfrom the dropdown, clickAddand clickNext. - Review your configuration and click the
Savebutton.
Create an Identity Provider (IdP) Adapter Instance
- From the PingFederate administrative console, click on
IdP Configurationand within theAPPLICATION INTEGRATIONsection, click onAdapters. - On the Manage IdP Adapter Instances page, click on
Create New Instance. - On the Create Adapter Instance page, enter the following information:
- Set INSTANCE NAME to
Sensu Enterprise HTML Form - Set INSTANCE ID to
SensuEnterpriseHTMLForm - Set TYPE to
HTML Form IdP Adapter - Click
Next
- In the IdP Adapter section, click on Add a new row to ‘Credential Validators’, select
Active Directory Credential Validatorfrom the dropdown, then clickUpdateand finally click ‘Next’ at the bottom of the page. - In the Extended Contract section, click
Next. - In the Adapter Attributes section, check the
Pseudonymcheckbox next to the username attribute and clickNext. - In the Adapter Contract Mapping section, click
Next. - Review your configuration and click the
Donebutton. - On the Manage IdP Adapter Instances page, click
Save.
Create the IdP Adapter Mapping
- From the PingFederate administrative console, click on
OAuth Settingsand within theTOKEN & ATTRIBUTE MAPPINGsection, click onIdP Adapter Mapping. - On the IdP Adapter Mappings page, select
Sensu Enterprise HTML Formfrom the dropdown and clickAdd Mapping, thenNext. - In the Attribute Sources & User Lookup section, click
Next. - In the Contract Fulfillment section, set the Source to
Adapterand Value tousernamefor bothUSER_KEYandUSER_NAMEcontracts, then clickNext. - In the Issuance Criteria section, click
Next. - Review your configuration and click the
Savebutton.
Create the Access Token Mapping
- From the PingFederate administrative console, click on
OAuth Settingsand within theTOKEN & ATTRIBUTE MAPPINGsection, click onAccess Token Mapping. - On the Access Token Attribute Mapping page, select
IdP Adapter: Sensu Enterprise HTML Formfrom the first dropdown andSensu Enterprise Clientfrom the second dropdown, clickAdd Mappingand thenNext. - In the Attribute Sources & User Lookup section, click
Next. - In the Contract Fulfillment section, select
Persistent Grantin the Source dropdown andUSER_KEYin the Value dropdown, then clickNext. - In the Issuance Criteria section, click
Next. - Review your configuration and click the
Savebutton.
Add an OpenID Connect Policy
- From the PingFederate administrative console, click on
OAuth Settingsand within theTOKEN & ATTRIBUTE MAPPINGsection, click onOpenID Connect Policy Management. - On the Policy Management page, click on
Add Policy. - On the Manage Policy section, enter the following information:
- Set POLICY ID to
SensuEnterpriseOIDCPolicy - Set POLICY NAME to
Sensu Enterprise OpenID Connect Policy - Select
Sensu Enterprise Clientfrom the ACCESS TOKEN MANAGER dropdown - Check the INCLUDE SESSION IDENTIFIER IN ID TOKEN checkbox
- Check the INCLUDE USER INFO IN ID TOKEN checkbox
- Click
Next
- In the Attribute Contract section, delete all attributes except
emailandname. - On the same page, enter
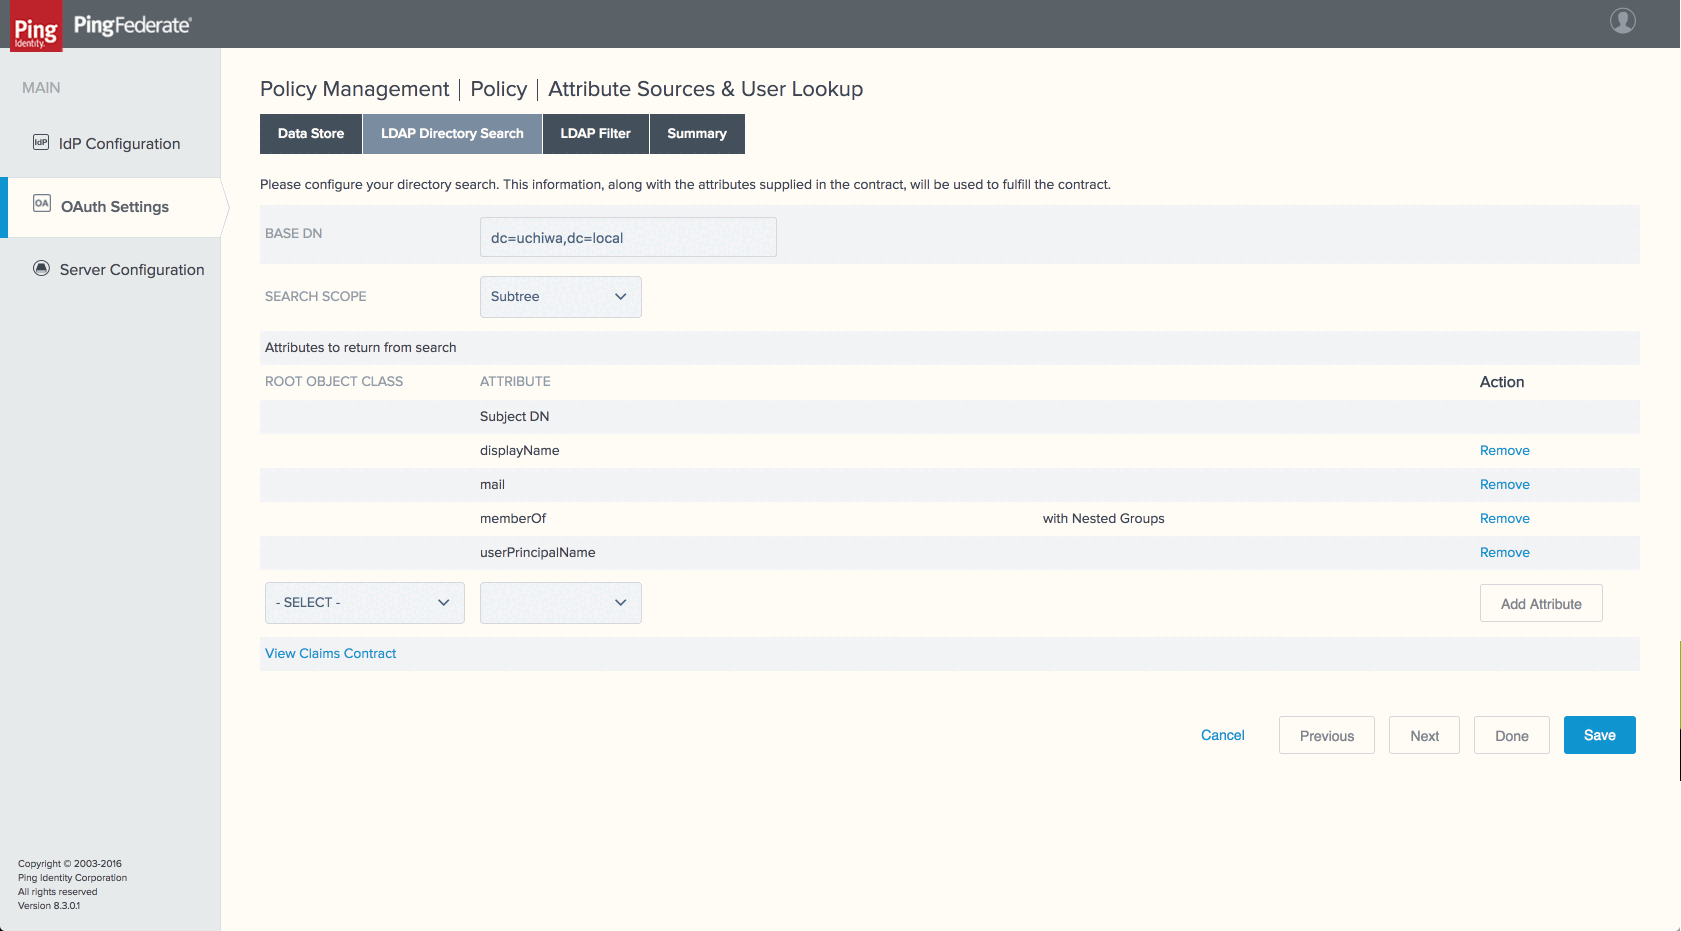
memberOfin the input and clickAddand then clickNext - In the Attribute Sources & User Lookup section, click on
Add Attribute Source. - In the Data Store section, enter the following information:
- Set ATTRIBUTE SOURCE ID to
ActiveDirectory - Set ATTRIBUTE SOURCE DESCRIPTION to
Active Directory - Select your LDAP data store from the ACTIVE DATA STORE
- Click
Next
- In the LDAP Directory Search section, enter the following information:
- Set BASE DN to the base DN of your LDAP server
- Leave Search Scope to
Subtree
- In the ROOT OBJECT CLASS dropdown, select
<Show All Attributes>. In the ATTRIBUTE dropdown, selectdisplayNameand clickAdd Attribute. - Repeat this last step for the following attributes:
-
Click
Next. -
In the LDAP Filter section, enter the following information in the FILTER textarea:
(&(sAMAccountName=${sub})(sAMAccountType=805306368)(!(userAccountControl:1.2.840.113556.1.4.803:=2)))
-
Click
Next. -
Review your configuration and click the
Donebutton. -
Back on the Attribute Sources & User Lookup section, click
Next. -
On the Contract Fulfillment section, enter the following information:
Attribute Contract Source Value email LDAP (Active Directory LDAP) mail memberOf LDAP (Active Directory LDAP) memberOf name LDAP (Active Directory LDAP) displayName sub LDAP (Active Directory LDAP) userPrincipalName 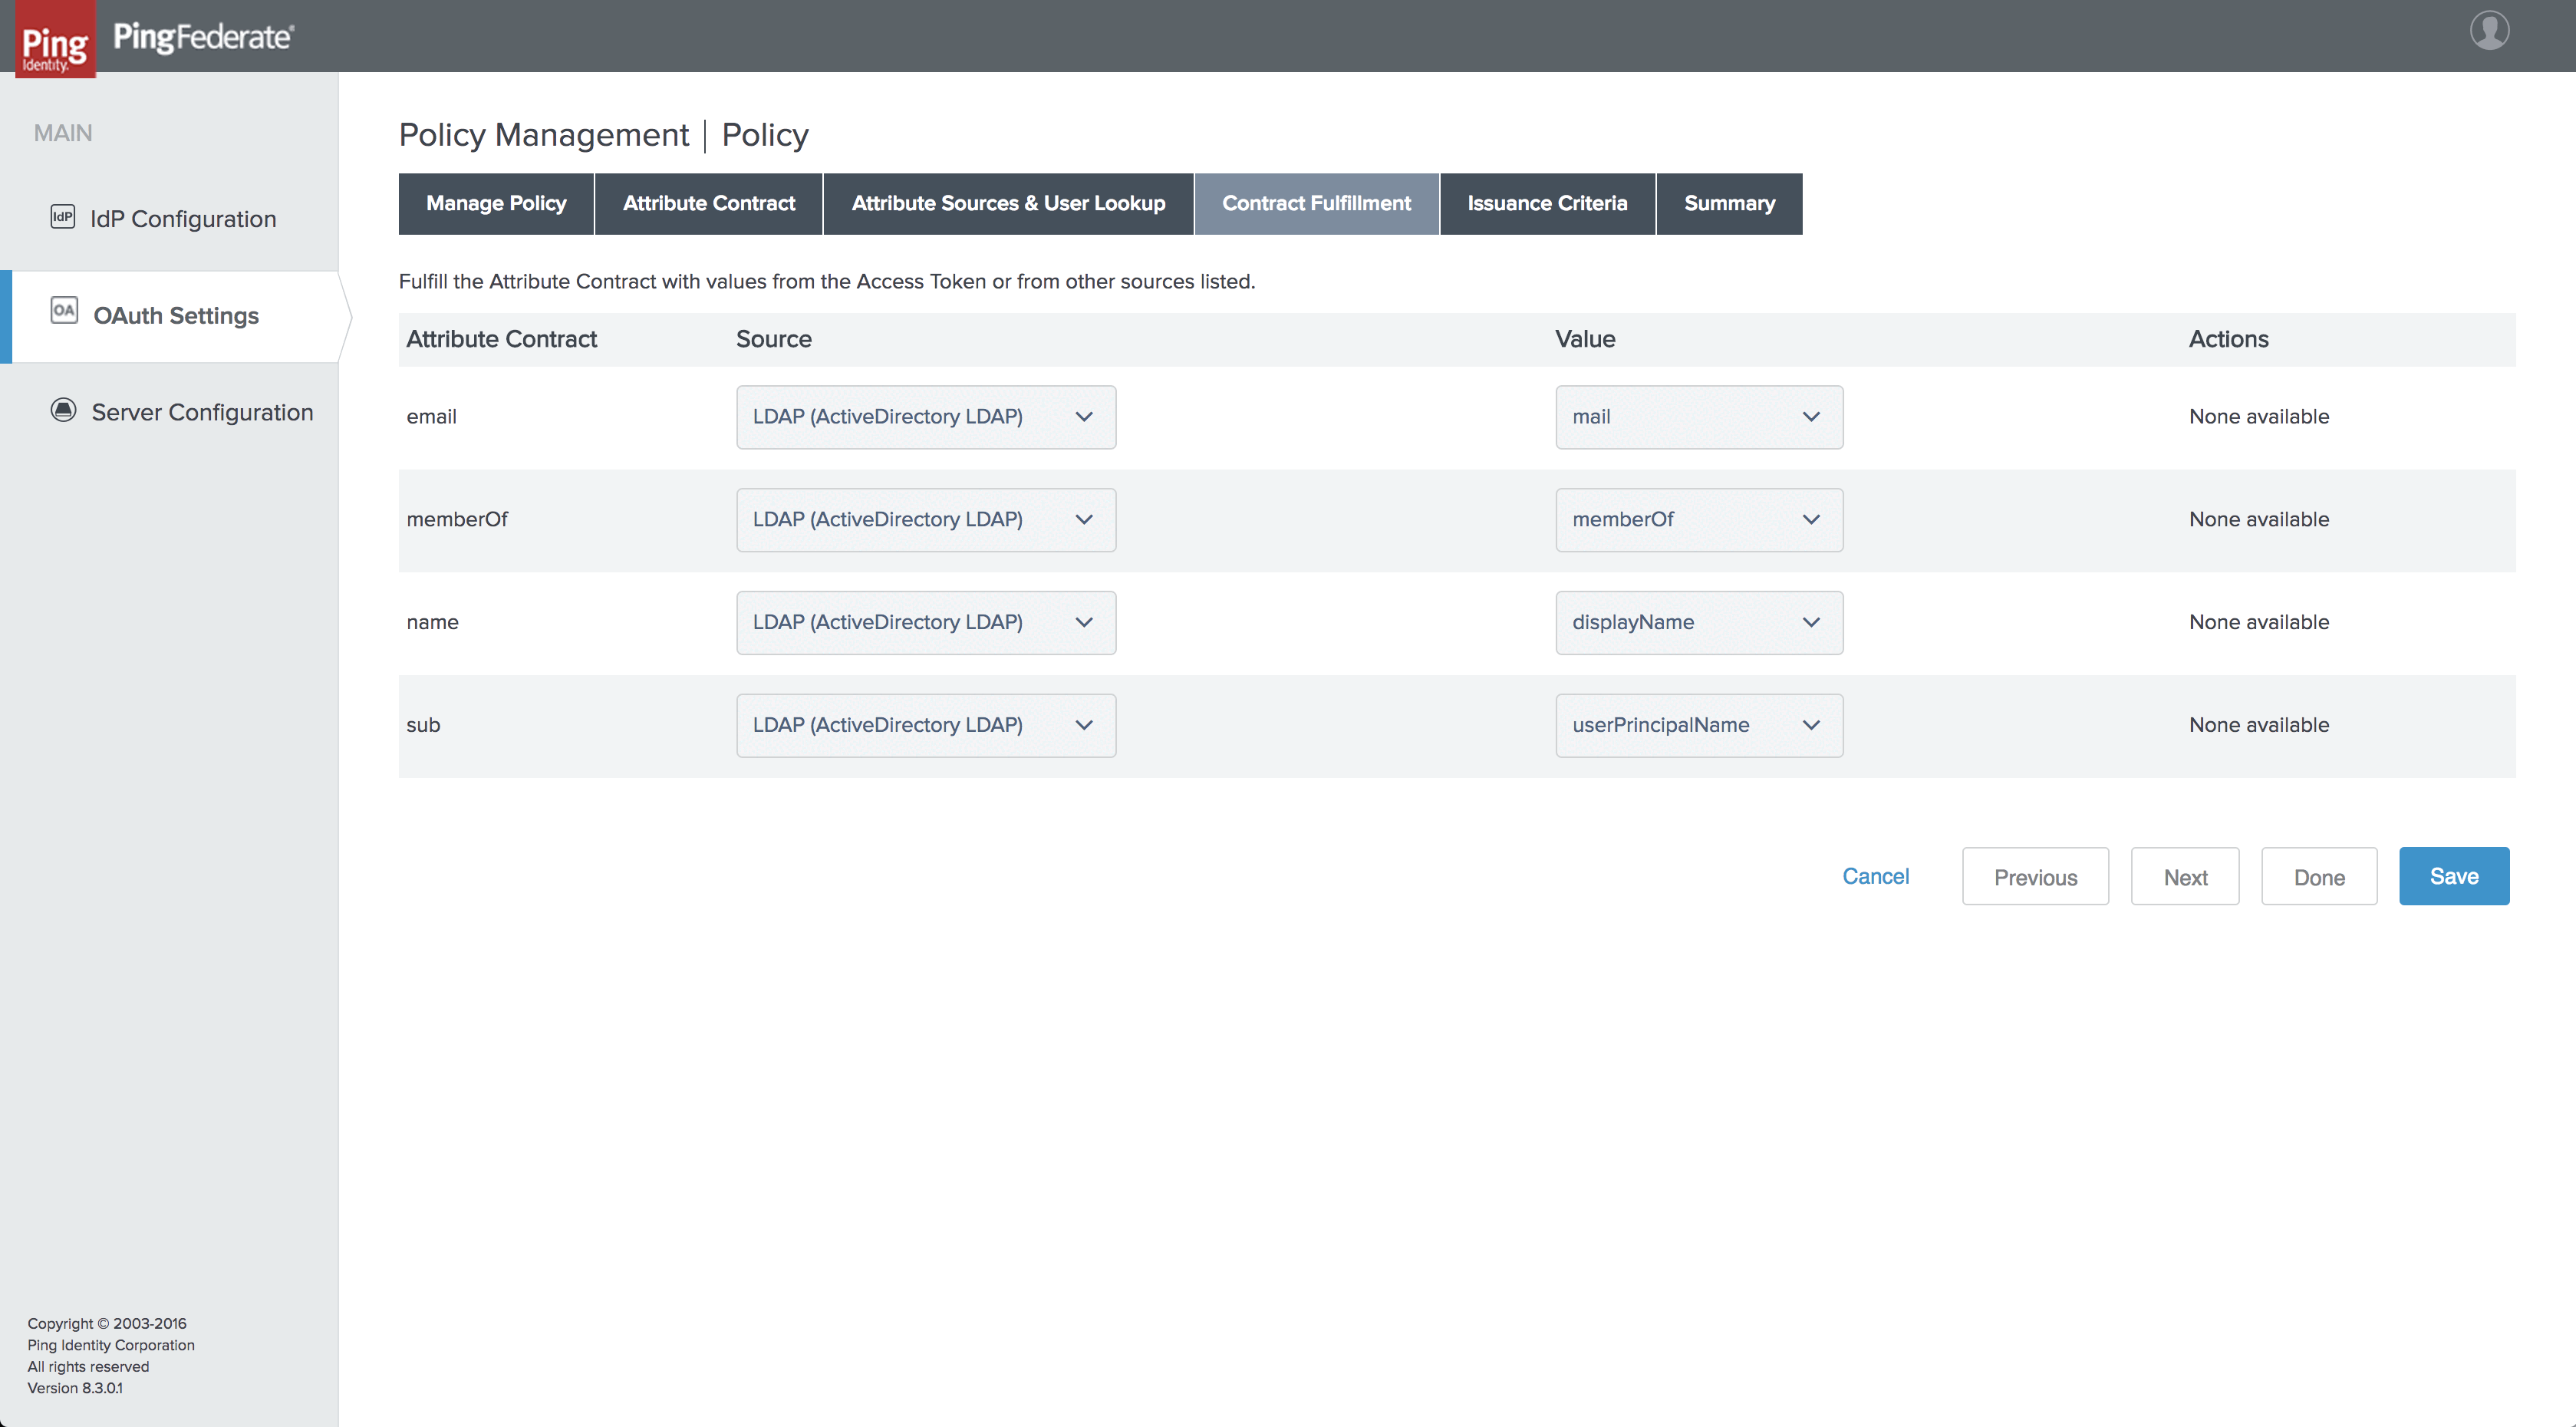
-
Click
Next. -
In the Issuance Criteria section, click
Next. -
Review your configuration and click the
Donebutton. -
Back on the Policy Management page, click
Save.
Configure the Sensu Enterprise Dashboard
From this point, the PingFederate configuration is completed the only thing
left is to configure the OIDC attributes in Sensu Enterprise. For
reference, if you followed this guide, the clientId should be
SensuEnterpriseClient and the clientSecret has been provided when you
generated a secret earlier.
